OK so if you’ve seen any of my other blogs you may know that in the spring of 2015 I decided to get a garden office and my creative juices got a little carried away and before I knew it my garden office was to become a beach hut…
I really love the driftwood and rustic look so was having a browse on Pinterest for ideas and I found a great shelving unit made from old wooden fruit crates. Not only did it look fab but it also looked quite easy to put together!
So that was it, once I get an idea in my head then I’m like a dog with a bone and I have to make it happen right now! Patience most certainly is not my strong point.
I started scouring the internet for old apple crates and as you can imagine, they are not the easiest to find unless you want to take out a mortgage for them. I found several sites that are exploiting the market and charging ridiculous amounts for them – one seller on Not on the High Street is charging a whopping £38 each for them. That old adage ‘one person’s junk is another person’s treasure’ certainly applies here!
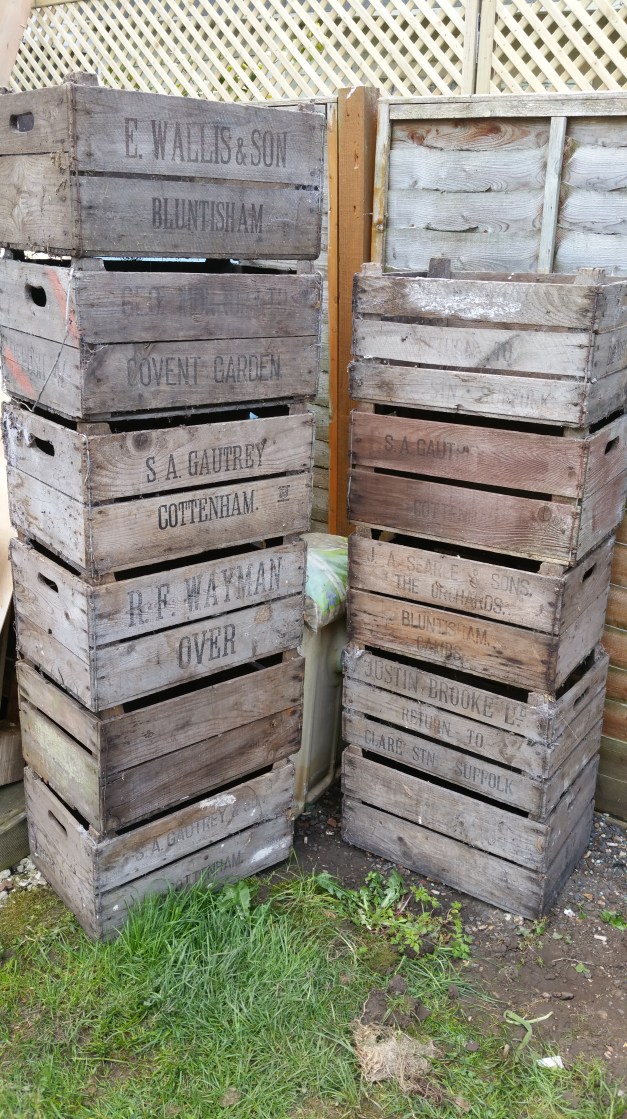
I certainly was not prepared to spend anywhere near that on them and saved a search for apple crates on ebay so got notified when new listings came up. It wasn’t long before a load came up locally. Someone was clearing their dad’s house after his sad passing and he was formerly a fruit and veg man, owning a market stall. He had a load of crates that had been stacked up in the back garden after he retired many years ago and they were all over 40 years old! I know this as a lot have dates on and some have how many shillings they were – shillings went out of circulation in 1971!
The crates had over the year served another purpose of being a breeding ground and home to all sorts of creepy crawlies, they were teaming with cobwebs, centipedes, beetles, spiders and other small creatures and it looked like woodworms were having a lovely time there too. I suspect most people would have looked at them and thought they were only fit as firewood but not me, no, I had a smile that stretched the width of my face and was filled with excitement. I have always been gifted in the ability to see the transformed project. The family seemed really surprised at how excited I was and I assured them that they would certainly be going to a good home and would receive all the TLC they needed and would once again be put to good use!


I was doubly excited when I saw that a lot had names of local towns and villages on and the fact that they were about the same age as me just made them even more special! Yep, I am totally the sentimental type and was loving the local history behind them. I was meant to be united with these beauties and they were the one’s! My long suffering partner helped me load the van up to the brim. I think in total we crammed in about 20.
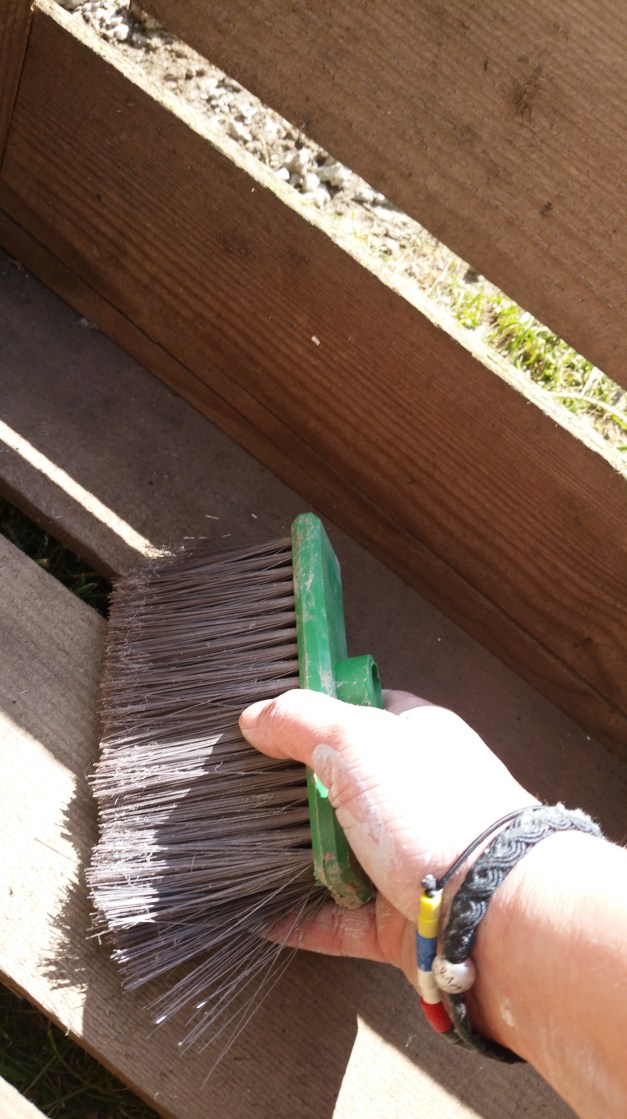
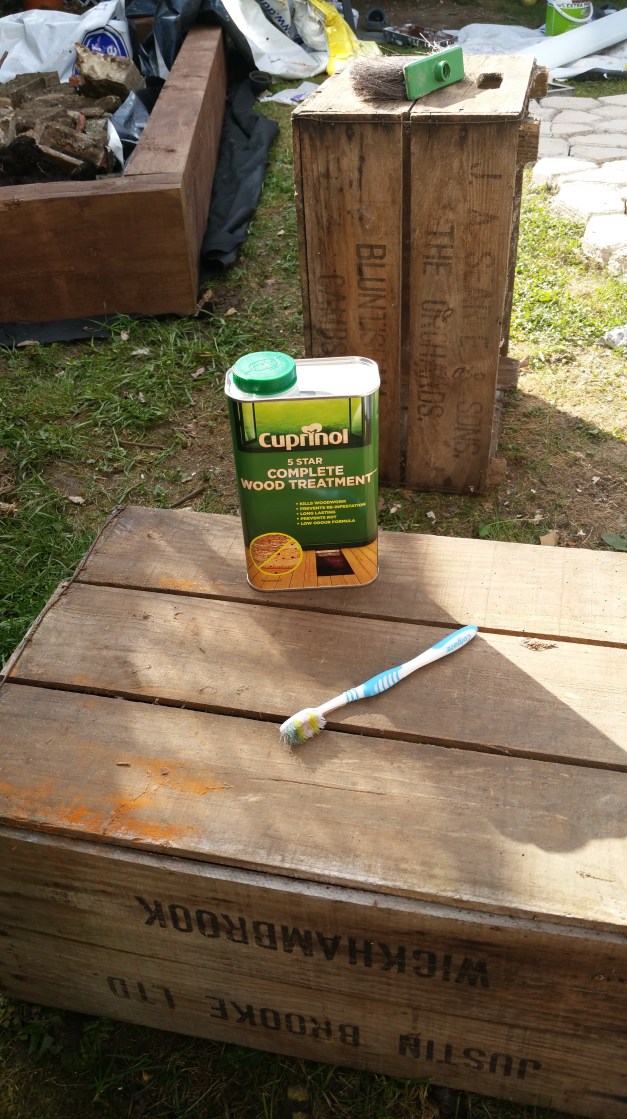
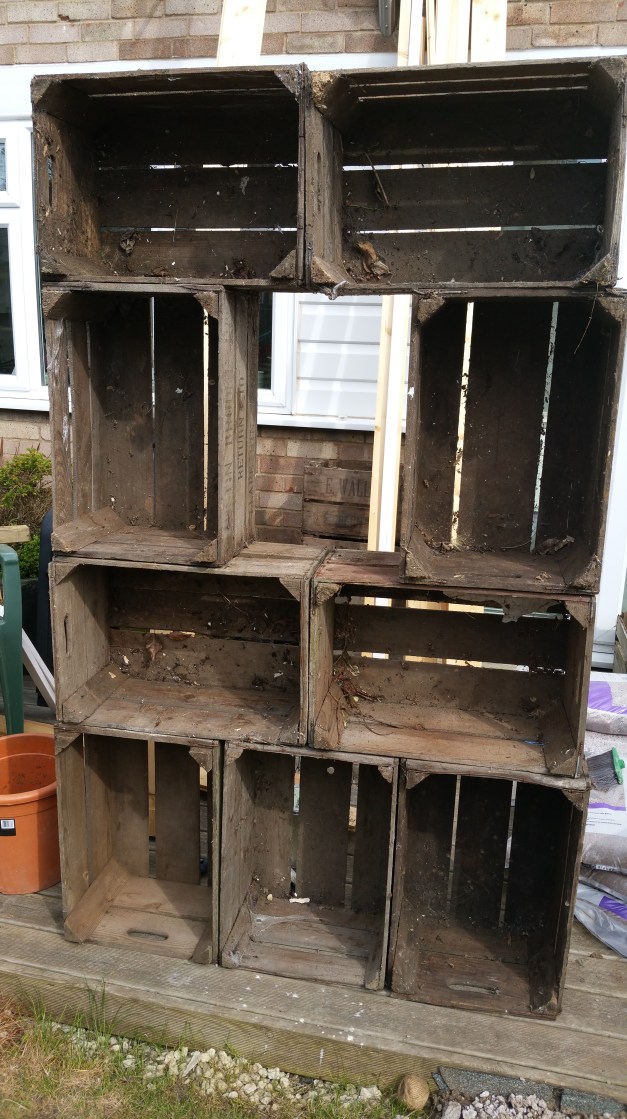 The first thing I did when I got home is see what formation I would put them in for my shelves before giving the crates a good clean. I started by using a hard brush to brush out all the cobwebs and debris, I also used an old toothbrush to get into the nooks and crannies, followed by a jet wash. I only used this as I happened to have borrowed one from a friend for the weekend and I was having quite a bit of fun with it, have you ever used one? They are amazing and certainly makes what could be a very time consuming job a piece of cake! I must add a jet wash to my birthday list! Yes, I’m not your average female who wants girlie things as gifts, give me a powertool anyday! 🙂
The next job was to treat them with woodworm killer just in case they were still active – I had read up a bit about woodworm and it was likely that it had come and gone but the last thing I wanted to introduce to my lovely new garden office made almost entirely from wood was woodworm!
The problem with some of these cool upcycle, re-use malarky projects is that while you can manage to get the items for a steal, it’s quite often that the paints, treatments etc that you use on them can be pretty pricey. Although what I’ve also found it that you can often make or find cheaper alternatives to some of these fashionable products. My DIY chalk paint is one of them!
Unfortunately I couldn’t find a cheaper solution, not sure if I researched it as well as I could though so please feel free to comment below if you know of any. However, luckily I’d recently discovered a great company called Wood Finishes Direct. I highly recommend these guys for good quality products at low cost. I would usually prefer to go to the local DIY store and have a good look around but I’m now a convert to ordering anything relating to wood treatment, or colour from these guys! They have the best customer service and the staff I have spoken to have been knowledgeable about the products and very friendly which is also a big plus in my book! What’s more they are open 7am to 7pm and delivery is very speedy and well packaged but what’s better is free if you order over £50! I cannot recommend them enough. Blimey anyone would think I’m being paid to advertise them! I’m not by the way, I just like to praise good companies with good values. Anyway, back to the subject in hand!
Excuse the mess of the garden, I was landscaping at the time!
What I was trying to get around to saying is that I needed to treat these lovely apple crates with woodworm killer. This stuff is not cheap! Being impatient I popped to B&Q and bought some cuprinol 5 star Complete Wood Treatment but it was quite pricey and it didn’t go too far so I then ordered some Barrettine Woodworm Killer and used a garden sprayer to apply it and left it to dry for the required time.
I only needed 8 crates to make my shelving unit and was going to use a couple for storage in my beach hut but I had ideas for the use of the others outside (this will be a different blog) so with the ones that would be exposed to the elements I treated with Barrettine Premier Wood Protective Treatment.
The next stage was to feed these poor beauties with some nutrients in the form of a wood oil. I can’t think which one I used but have since found some cheap linseed oil at Wickes (I think) and gave them a generous two coats – they could have probably done with more but as I said earlier I’m too impatient.
After giving them a bit of oil, they looked so much more healthier and I then went about setting it up with the intent on fixing them together with screws however when I put them into a formation they kind of stayed so I decided to just put them in the beach hut like that and they’ve been absolutely fine.
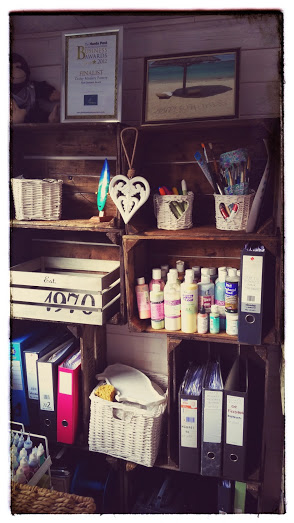
They look and are so fab! I love them and have used it for all my crafting stuff and some files.
What do you think? Comments below…